The Workflow module provides a number of options to trigger actions based on events in the application or time based events.
To configure a workflow for a module enter the application as an admin user, go to the Settings page and click on the Workflows link (this can be found under the Other Settings block)
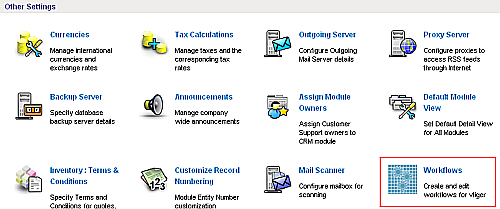
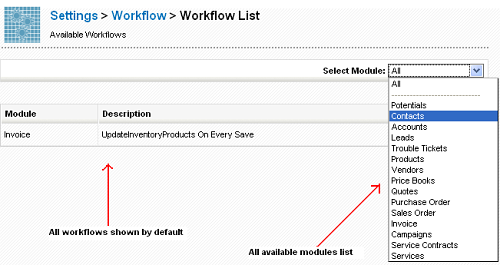
This will bring up the list of all defined workflows (by default all workflows are listed).
You can see all the available workflow for any particular module using the Select Module dropdown on the page.
The Workflow extension provides options to
- create a new workflow
- edit an existing workflow
- delete an existing workflow
Create Workflow
Click on the New Workflow button. A popup will appear listing the available modules.

Select a module and click Create. You will be taken to an edit page for the workflow.
Add a Description for the workflow. You can specify here when the workflow should run.
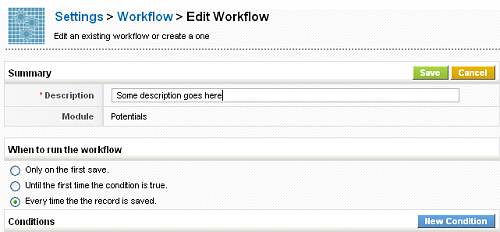
You can add more conditions by clicking the New Condition button.

Click the 'Save' Button to save the new workflow.
Once you have saved the workflow, you will be presented with a screen where you can add the tasks for the workflow. These task(s) will be executed once the workflow conditions are satisfied.
Create tasks
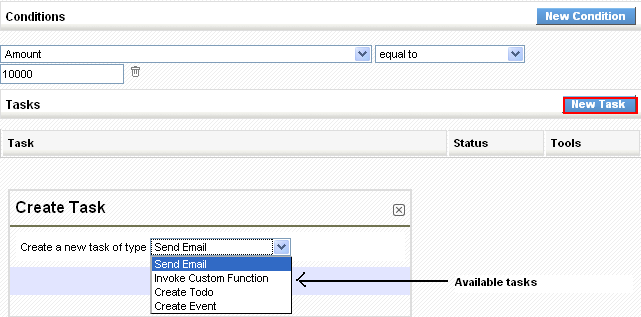
Click on the New Task button to add a new task. You will get a popup to select the type of task you can create. There are multiple types of tasks, among which you may find:
*//Send Email// task which can be used to send emails
*//Invoke custom function// task which will call certain specific methods on the entity objects.
*//Create Todo// task which will create a todo when the workflow condition is met.
*//Create Event// task, which will create an event.
Select a task type from the dropdown and click on the create button to create the task.
Configuring tasks
Common Fields
The following fields are common for all workflow tasks
*//Task Title// - This is the title of the task used in the task list to identify the task.
*//Status// - This is a selection box which should be set to active if the task is to be executed when the workflow executes.
*//Execute the task after some delay// - If this is checked you will be provided with additional fields to specify a time delay for when the task will be executed. You can specify when the task is executed relative to the time in a date field on the record.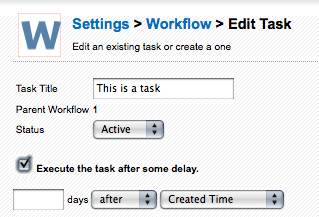
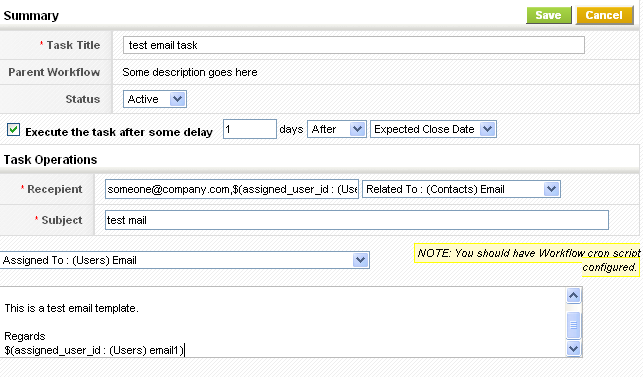
Email Task
Invoke custom function
This option provides a way for developers to add module specific actions to workflows. To define a task, you need to define a method to be called. This method should be defined as a function in it's own file.
<?php
function demo($entity){
    $entity->focus->called = true;
}
?>
The method then needs to be registered, for example if the method was defined in the file modules/demo/Demo.inc for the Contacts module and given the name method.
require_once 'include/utils/utils.php';
require 'modules/com_vtiger_workflow/VTEntityMethodManager.inc';
$emm = new VTEntityMethodManager($adb);
$emm->addEntityMethod("PurchaseOrder", "method", "modules/Workflow/Demo.inc", "demo");
The method will appear in the list of methods available for the Contacts module.

Todo Task
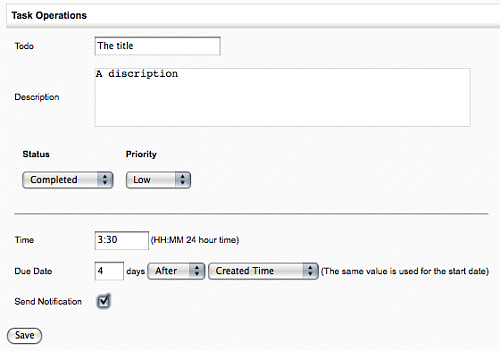
Using this option, you can setup a workflow to create a new calendar Todo when a condition is matched. The following fields are provided in the create view of this option
*Todo - The title of the todo.
*Description - Of the todo.
*Status - The status of the todo, can be selected from the dropdown
*Priority - The priority of the todo, can be selected from the dropdown.
*Time - The start time of the todo, in 24 hours time.
*Due Date - The due date for the todo, the start date is also set using this.
*Send Notification - Set the send notification flag.
If the module which triggers the workflow is Contacts then the Contact Name field will be bound to the contact. If the module is one of the acceptable modules for the Related To field then the module Related To field will be bound to the module.
Event Task
This is same as Todo task other than that it creates an event instead of a task.
Next | Chapter 3: Scheduled Time based Workflows.