This integration supports a two-way synchronization of products and customers between the two applications and a one-way synchronization of orders from the WordPress website to your coreBOS. So we will be able to automatically receive all our website orders inside coreBOS where we can manage them in our business logic while triggering all our workflows and business processes.
Once configured the integration just works transparently in the background.
The configuration has two parts, one in coreBOS and the other in WooCommerce.
In WooCommerce
-
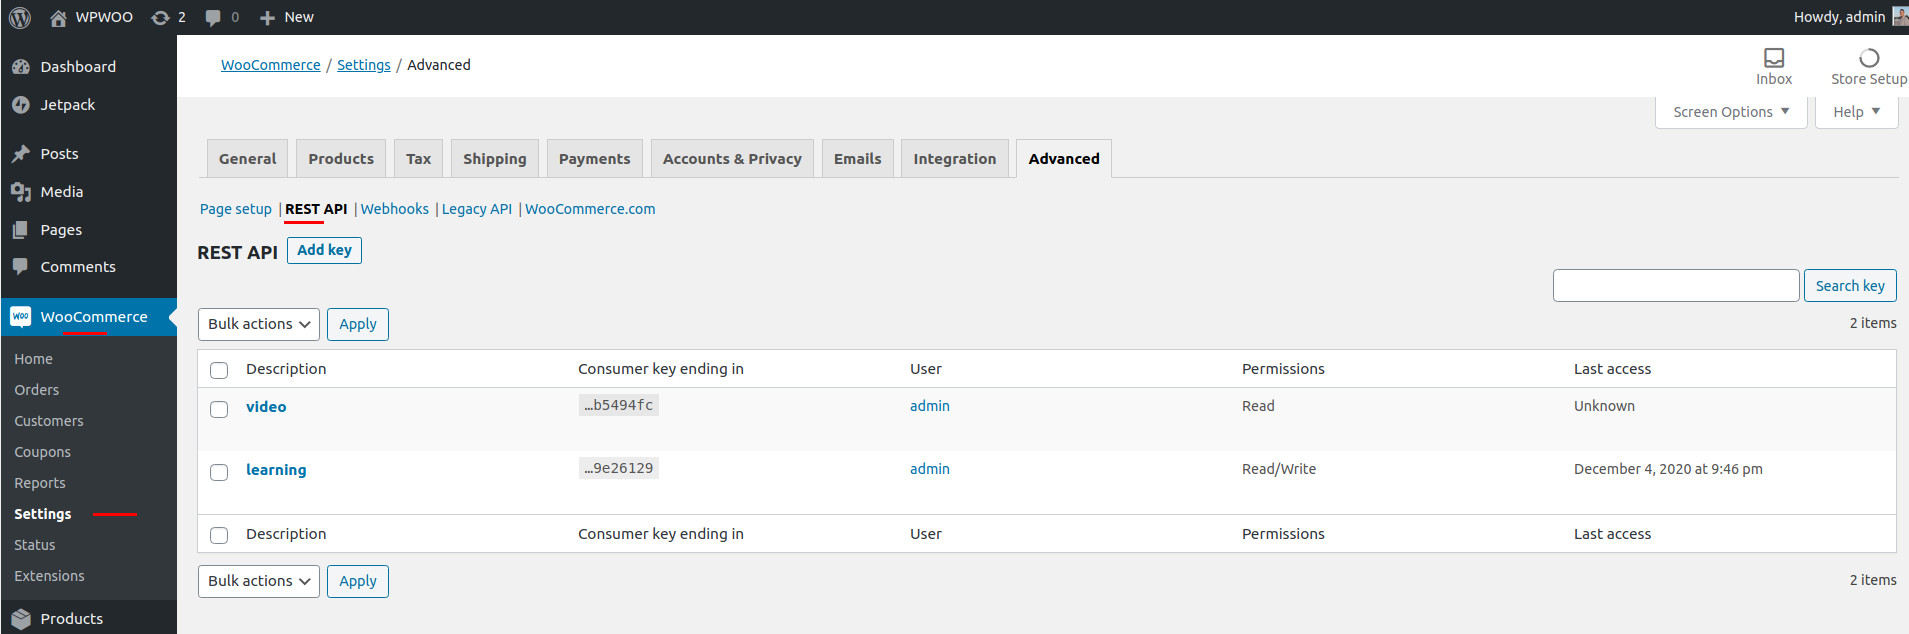
go to WooCommerce > Settings > Advanced > REST API
-
set a name for the access
-
select a user (admin)
-
give Read/Write permission
-
click next to see the consumer key and secret. Copy these values as you will need to give them to coreBOS
-
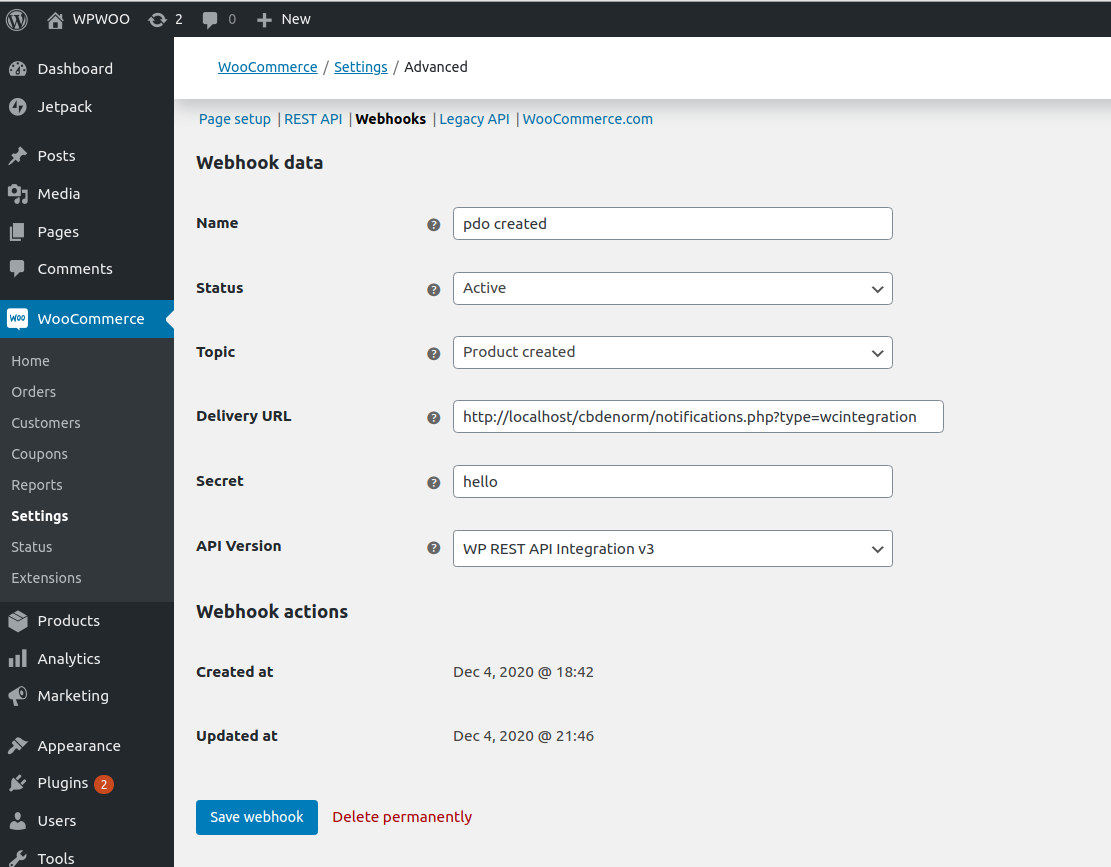
select the "webhooks" option (next to REST API)
-
add new web hooks for
- Product Create, Update, Delete and Restore
- Customer Create, Update, Delete and Restore
- Order Create, Update, Delete and Restore
-
give them names and make them Active
-
set the URL to
https://your_corebos_server/your_corebos/notifications.php?type=wcintegration -
define a strong secret and copy it to save it in coreBOS later
-
use the latest API version (3 minimum)
-
now activate and define the taxes for your website
In coreBOS
-
go to the Integrations page in Utilities
https://your_corebos_server/your_corebos/index.php?module=Utilities&action=index -
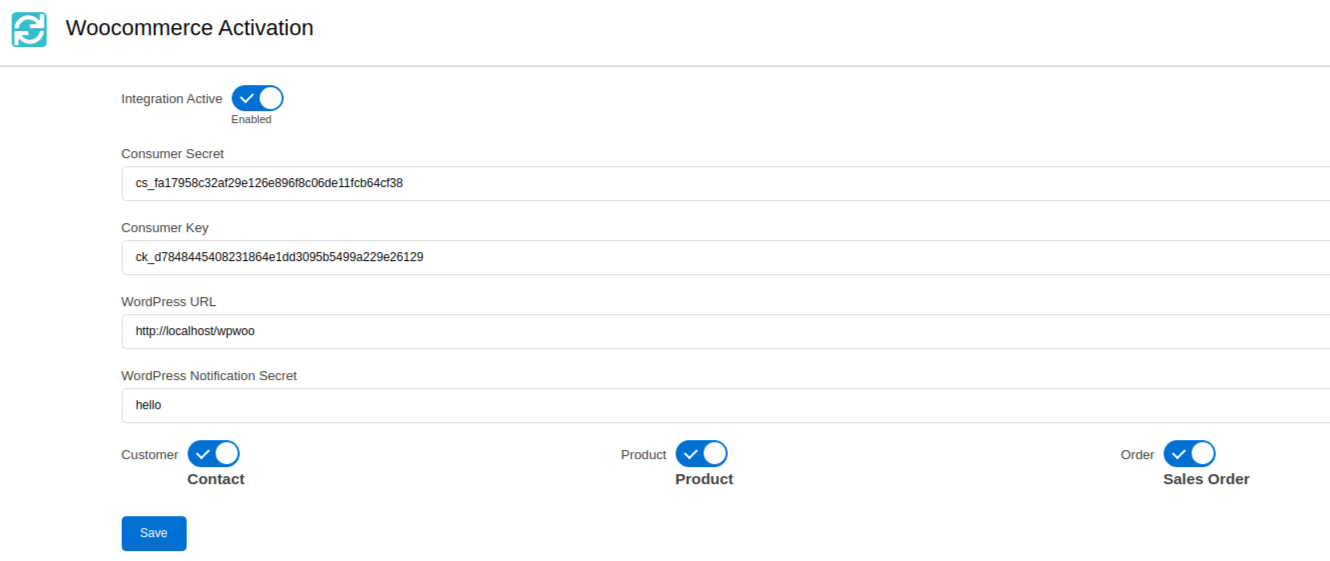
Click on the WooCommerce section
-
set the consumer key, the consumer secret, and the notifications secret which you set in WooCommerce
-
set the WordPress URL
-
select the default modules we will sync with. WooCommerce has three entities: Products, Customers, and Orders. In coreBOS, we can map Customers to Accounts or Contacts, Products to Products or Services, and Orders to SalesOrders or Invoices. You must define the modules you want to work with by default. Despite this selection, you can still synchronize the other modules for Customers and Products.
-
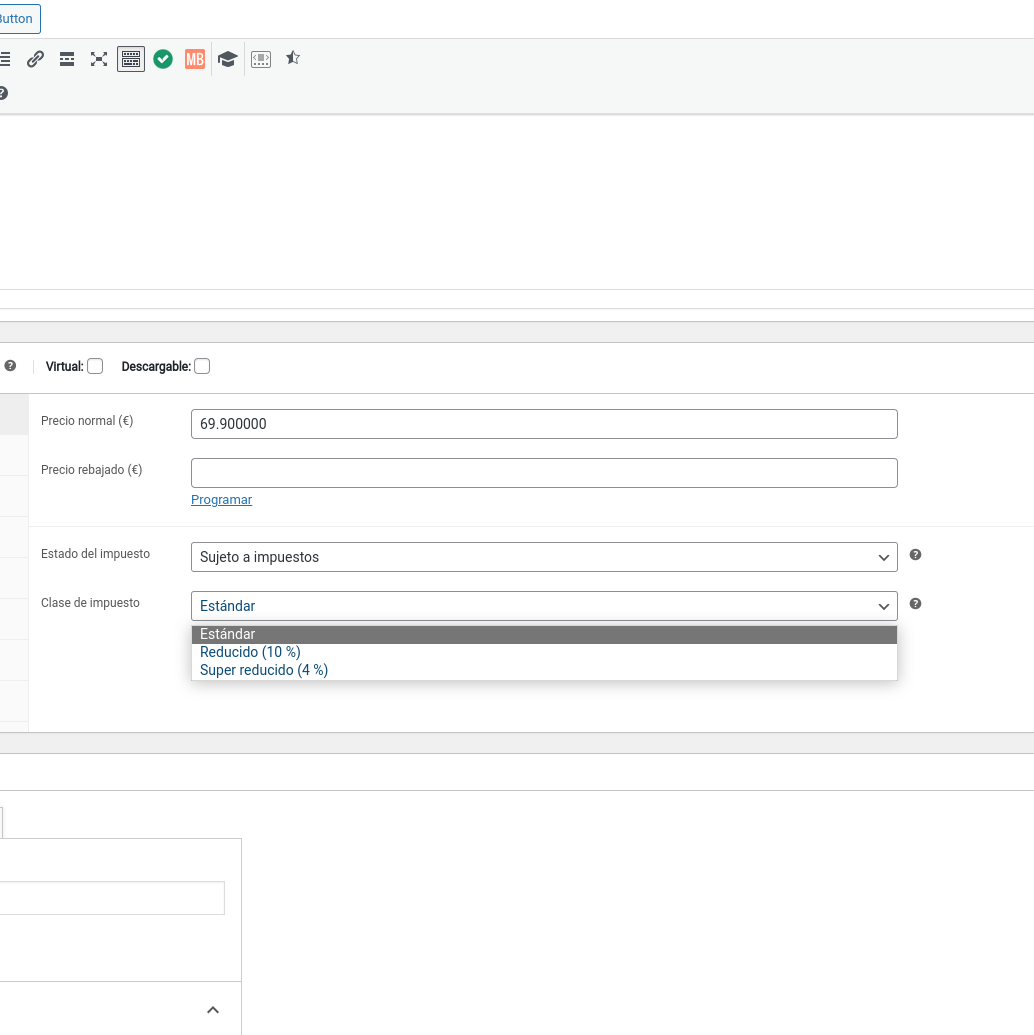
If you have different taxes for each product on your site, yo have to define the same taxes on corebos and after you have to create two business maps to indicate each corebos tax is on woocommerce.
- Go to a product in your woocommerce and look available taxes that you have.
-
Check that you have the sames taxes on your coreBOS

-
Set global variable Inventory_Tax_Type_Default in corebos to value equal to individual
-
Found the internal values for each tax on you woocommerce, inspecting code on the picklist that we showed you in step 1.
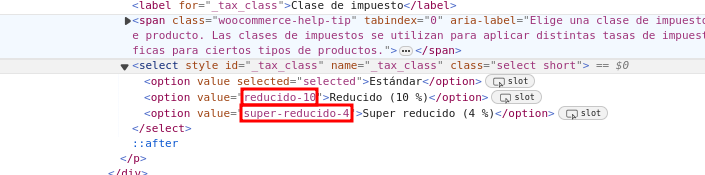 Standar tax, always will be an empty value. Don't worry we have controlled on our corebos code integration if you indicate the name standart.
 -
Go to Business Maps module in your corebos and create a new map to indicate tax names in woocommerce what tax are in corebos, with the next name.
WC2ProductsTaxes
<map>
  <originmodule>
    <originname>woocommerce</originname>
  </originmodule>
  <targetmodule>
    <targetname>Products</targetname>
  </targetmodule>
  <fields>
    <field>
      <fieldname>tax1</fieldname>
      <Orgfields>
        <Orgfield>
          <OrgfieldName>standard</OrgfieldName>
          <OrgfieldID>21.000</OrgfieldID>
        </Orgfield>
      </Orgfields>
    </field>
    <field>
      <fieldname>tax2</fieldname>
      <Orgfields>
        <Orgfield>
          <OrgfieldName>reducido-10</OrgfieldName>
          <OrgfieldID>10.000</OrgfieldID>
        </Orgfield>
      </Orgfields>
    </field>
    <field>
      <fieldname>tax3</fieldname>
      <Orgfields>
        <Orgfield>
          <OrgfieldName>super-reducido-4</OrgfieldName>
          <OrgfieldID>4.000</OrgfieldID>
        </Orgfield>
      </Orgfields>
    </field>
  </fields>
</map>-
Now just you need to create an ohter map but in the other way with the next name.
Products2WCTaxes
<map>
  <originmodule>
    <originname>Products</originname>
  </originmodule>
  <targetmodule>
    <targetname>woocommerce</targetname>
  </targetmodule>
  <fields>
    <field>
      <fieldname>standard</fieldname>
      <Orgfields>
        <Orgfield>
          <OrgfieldName>tax1</OrgfieldName>
        </Orgfield>
      </Orgfields>
    </field>
    <field>
      <fieldname>reducido-10</fieldname>
      <Orgfields>
        <Orgfield>
          <OrgfieldName>tax2</OrgfieldName>
        </Orgfield>
      </Orgfields>
    </field>
    <field>
      <fieldname>super-reducido-4</fieldname>
      <Orgfields>
        <Orgfield>
          <OrgfieldName>tax3</OrgfieldName>
        </Orgfield>
      </Orgfields>
    </field>
  </fields>
</map>- finally, you have to activate the message queue processor which is done in the operating system with the command
php include//cbmqtm/run.phpyou have to make sure this process is running continuously for the integration to work
Here you have a video presentation of the steps and the functionality.
These are the two maps I used for testing:
WC2Products
<map>
  <originmodule>
    <originname>woocommerce</originname>
  </originmodule>
  <targetmodule>
    <targetname>Products</targetname>
  </targetmodule>
  <fields>
    <field>
      <fieldname>productsheet</fieldname>
      <Orgfields>
        <Orgfield>
          <OrgfieldName>slug</OrgfieldName>
        </Orgfield>
      </Orgfields>
    </field>
    <field>
      <fieldname>description</fieldname>
      <Orgfields>
        <Orgfield>
          <OrgfieldName>description</OrgfieldName>
        </Orgfield>
      </Orgfields>
    </field>
  </fields>
</map>
Products2WC
<map>
  <originmodule>
    <originname>Products</originname>
  </originmodule>
  <targetmodule>
    <targetname>woocommerce</targetname>
  </targetmodule>
  <fields>
    <field>
      <fieldname>stock_quantity</fieldname>
      <Orgfields>
        <Orgfield>
          <OrgfieldName>qtyinstock</OrgfieldName>
        </Orgfield>
      </Orgfields>
    </field>
  </fields>
</map>Links
- WordPress Woocommerce
- WooCommerce API - PHP Client
- Woocommerce REST API
- This integration uses the coreBOS Message Queue
Frequently Asked Questions
How can we send HTML descriptions to WooCommerce and back
In WooCommerce the description will be stored in the wp_posts table inside post_content column. In general WordPress uses some filters to encode and decode the value of post_content before saving and displaying it. You need to use Wordpress wp_insert_post_data hook to modify the passed value of post_content before saving it to the database.
You can modify that hook like this:
add_filter( 'wp_insert_post_data' , 'filter_post_data' , '99', 2 );

function filter_post_data( $data , $postarr ) {
  // Change post content
  $data['post_content'] = html_entity_decode($data['post_content']);
  return $data;
}
The goal is to save the raw data with html tags on the database. That script can be added to your child theme’s functions.php file or via a plugin that allows custom functions to be added.