Google Synchronization
You can view or synchronize your Google events with your coreBOS events using the Calendar. Firstly you have to set up your Googleaccount/credentials.
- In case you have more calendars within your Google account, please select the calendar which you would like to use. Please note that one activity type can be synchronized with only one Google calendar.

- An additional step is to define export and import i.e. synchronization:
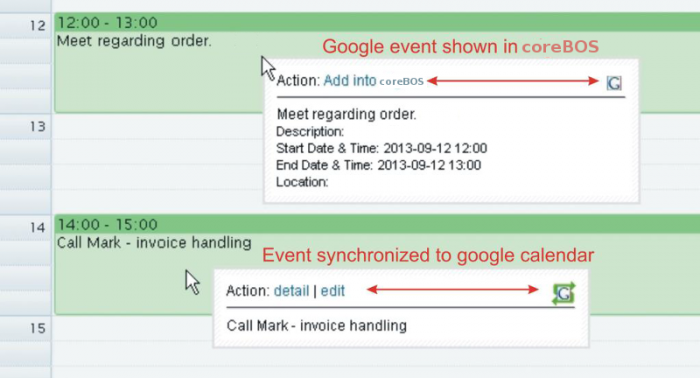
- Export "activity_name" to calendar – checked means that all new created events in the Calendar will be also exported and visible in the Google calendar. In addition any change of these events will be synchronized towards Google calendar. These events are marked with an icon.
- Import from calendar to "activity_name" - checked means that all new created events in Google calendar will be also visible in the Calendar. In addition any change of these events in Google calendar will be synchronized towards the Calendar. These events are marked with an icon and are not editable on the Calendar side.
- Click on the [Save ] button to save the synchronization settings.
The Calendar allows you to add Google events into coreBOS (see blue link "Add into coreBOS" in the below picture). Please click on this link to add this event to coreBOS.
Separating Events/Calendars
The problem I am facing is that personal events that I have on my Google calendar are showing up on my task list in coreBOS. How can I get this to stop? I do not keep 2 calendars and I prefer to work with only one. I see in calendar settings that "Google is connected" for my user name. Is this why my task list is picking up everything from my Google calendar?
Have a read at this page for some indications.
Setup calendar event synchronization
In the image below you can see a simple example of synchronization with Google via separate activity "Google events". These are the steps:
- Using CRM Settings > Picklist Editor create a new Activity Type for "Events" called "Google events" (you can name it as you wish).
- In your Google calendar create a new separate calendar – in the example the name used was ITS4You meetings (again, you can name it according to your needs).
- Set up synchronization with Google calendar by clicking on the small "down" arrow that appears when you hover over the newly created event.
- You will see that "Google events" are visible in both Calendars with a separate activity type and color.
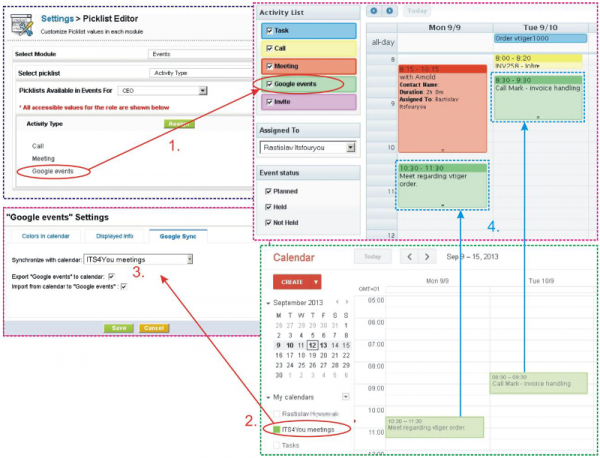
We implement this approach so it is easy to define which events should be imported to and from Google. It is also suitable in case you don’t need to synchronize your activities with Google anymore and you want to deactivated it.
Configuring your connection with Google Calendar
We have updated Google Integration from API v.1 (already deprecated by Google) to the newest API v.3.
The integration is being done through Web Application Client ID, which lets a user login to Google Calendar in the background by previously entering these parameters:
- API Key,
- Client ID.
- Client Secret
- Redirect URL.
Due to Google Security issues, integration does not require user's email password anymore. So you just have to configure the parameters above and validate the admin user, the rest of users, just need to click on the Authorize and Connect link to give permission to the admin user to manage and share their calendars.
Here is a step by step guide to help you configure your Google Account.
1.- Go to the link https://console.cloud.google.com/cloud-resource-manager?pli=1 2.- Create your project

3.- Go to the Project. Click API in APIs&auth section and activate the Calendar API
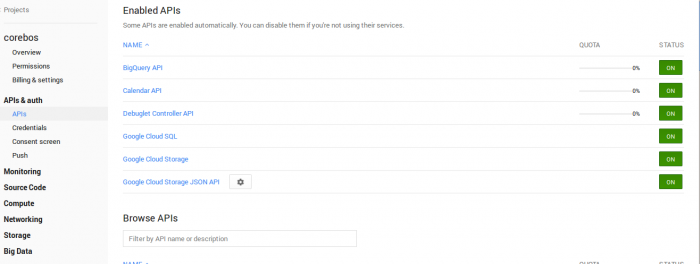
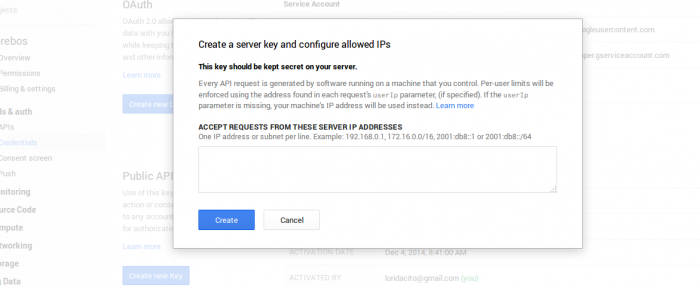
4.- Go to the Credentials section and create the Public API Key by clicking Create New Key. Choose Server Key
5.- Create Web Application by clicking Create New Client ID in the OAuth section. Choose Service Account Option
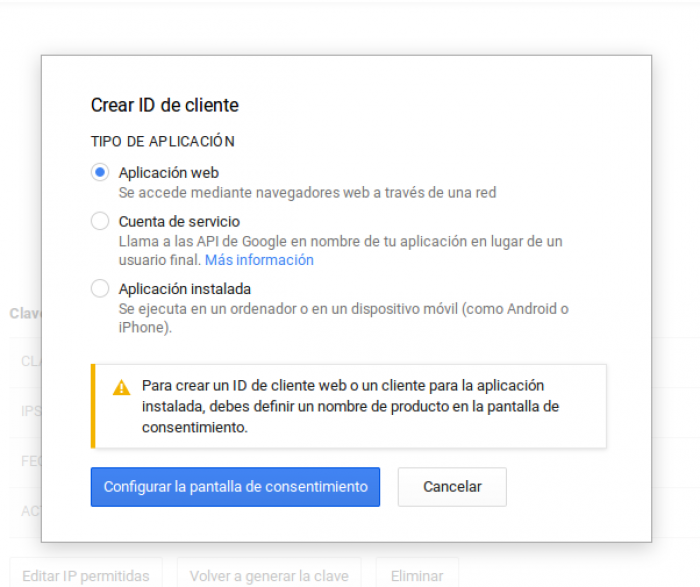
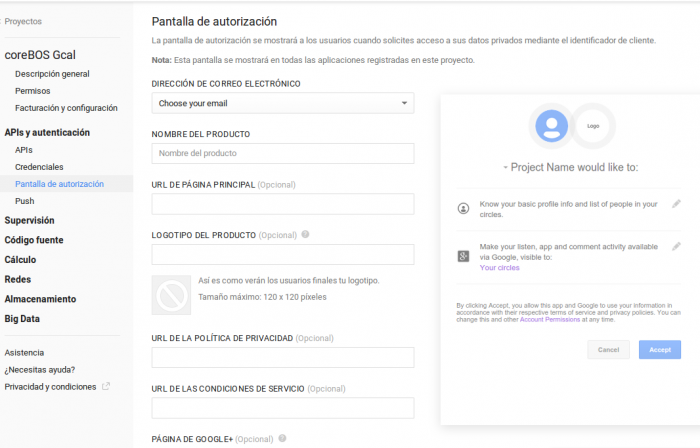
6.- For permit you to create this Client ID , you have to set the values for you Authoritation Screen.
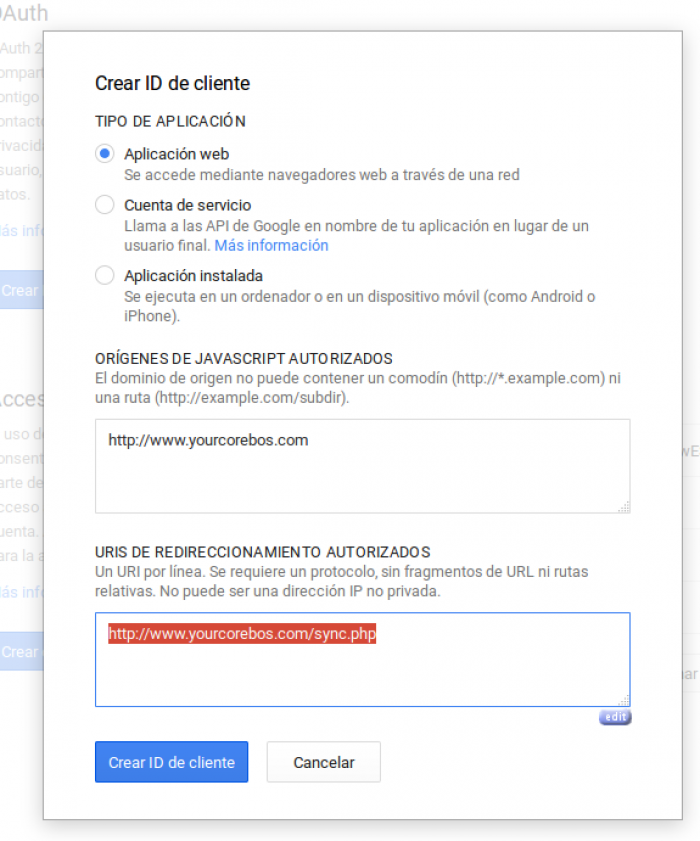
7.- Now you can finish to config the Client ID, here is important that you write the url to your coreBOS/sync.php in Redirect URI. For example: http://yourcorebos.com/sync,php.
After that, you can see the all data that you need to config Calendar4You.
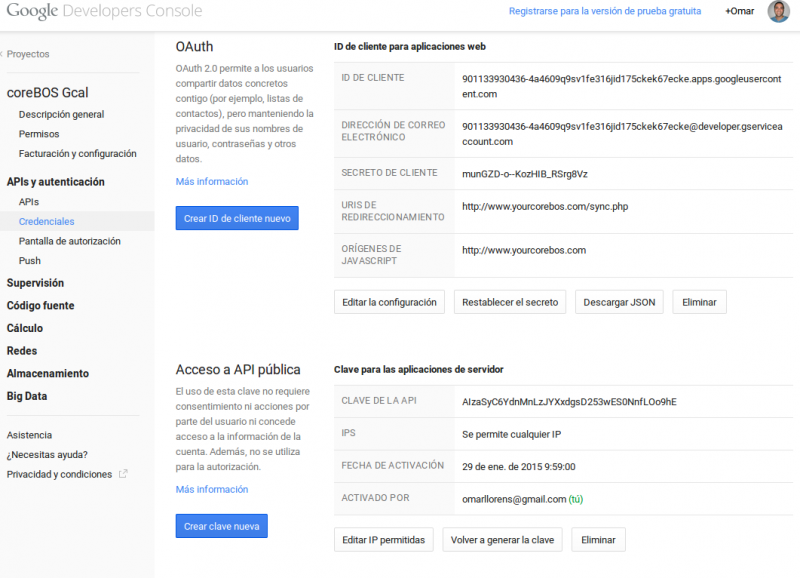
8.- Now access to your coreBOS like a admin user to copy the last parameters in Calendar4You settings

9.- Press on Settings icon to paste the next value in the next window.

- API Key,
- Client ID.
- Client Secret
- Redirect URL.
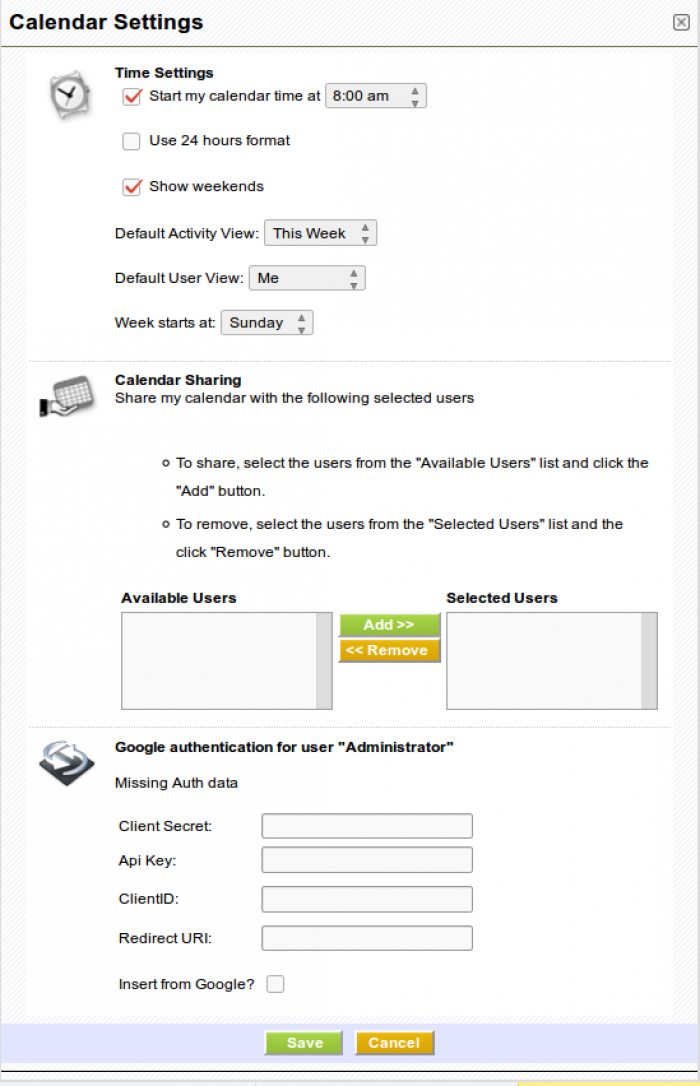
The checkbox, insert from Google? is for read the old and new events that you create in you Google Calendar and create this events in you Calendar4You in coreBOS.
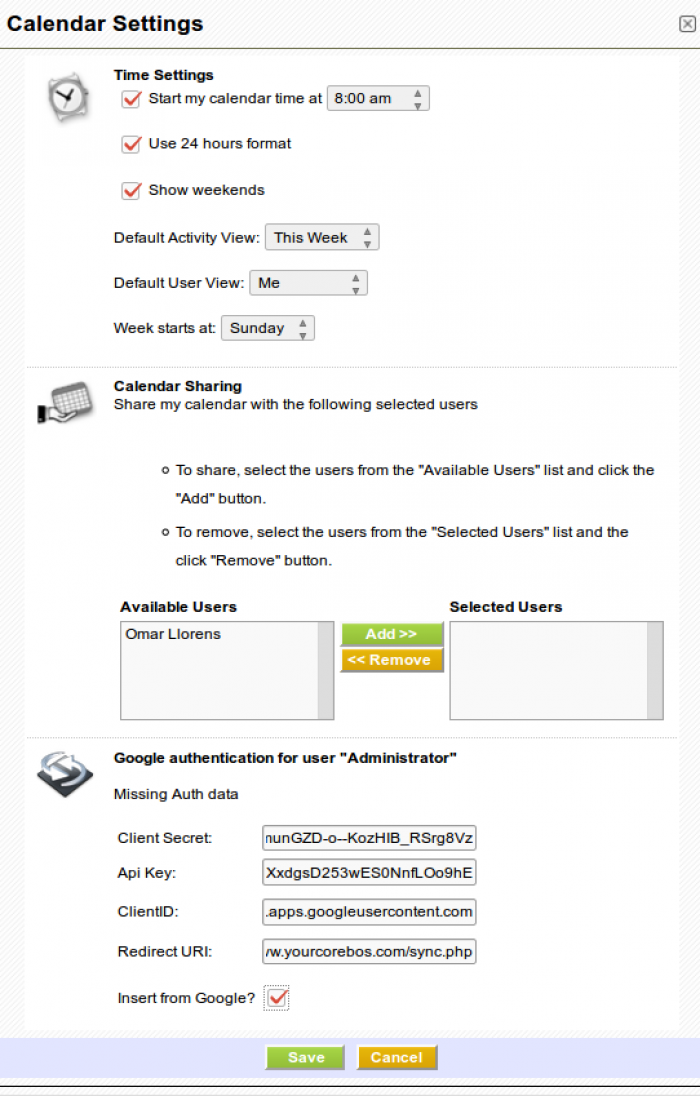
Now you can press Save button to verify this data and if this date is correct the window will be close.
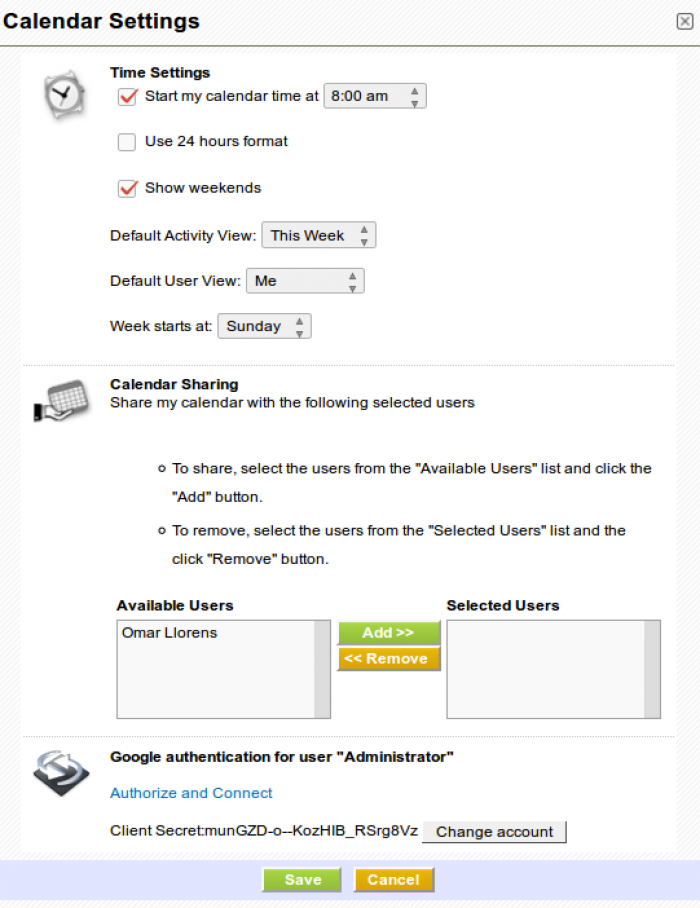
11.- After to save the previous data, you have click again in Settings

and you can see that you can clic in a new link called Authorize and Connect , for permit coreBOS to manage your calendars. Now this Authorization is for the actual google user that you have connect in your browser. If you disconnect, you will can to choose an other user to give this authorization
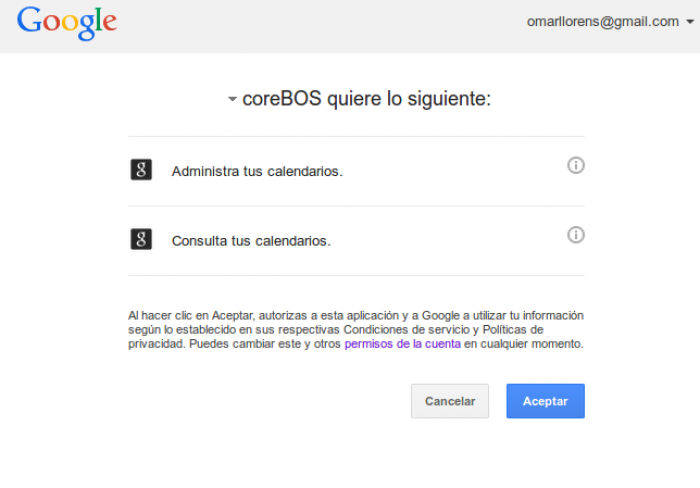
11.- After to permit, you can to select your calendars to add a event type like a Meetings
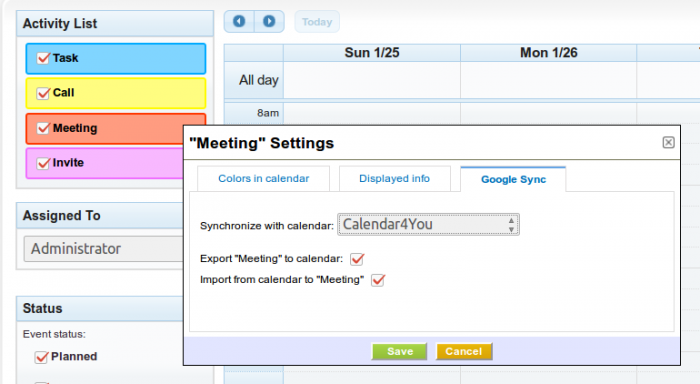
12.- Now your configuration is done, and the rest of users just have to access to their Calendar4You , try to add a google calendar to a event type and in the first time they will see the famous Authorize and Connect link.

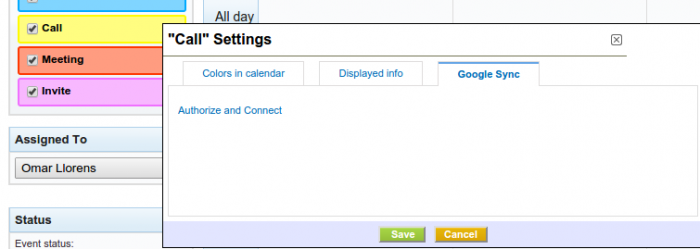
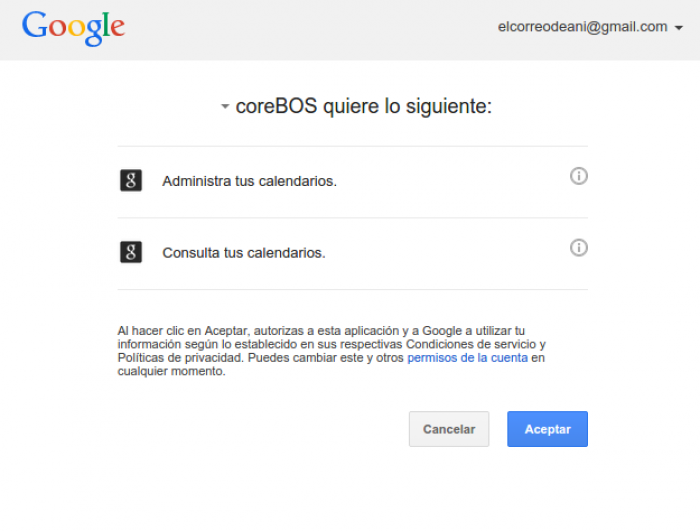
Click on the link , permit coreBOS to manage the calendars and finally you will can to select your calendars to your event types.

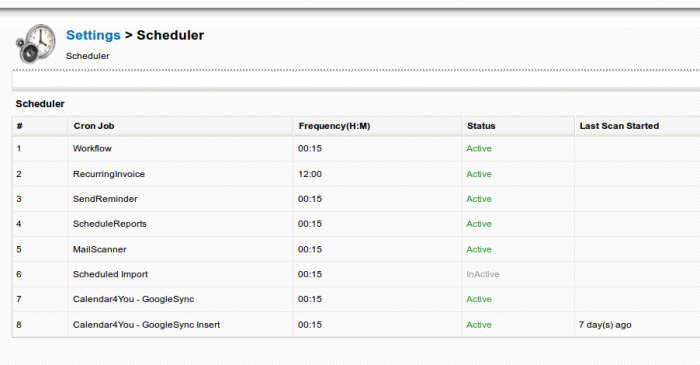
13.- Just an other thing. For active the Calendar4You Crons to sync the events with Google Calendar, you have to go to coreBOS Settings -> Scheduler the last two crons that you can see the next image.
That's it. Enjoy!
Considerations
- Google calendar update cron updates only NOT HELD events:
(vtiger_activity.status != 'Held' OR vtiger_activity.status IS NULL)- Deleting the event from google calendar doesn't delete it from the calendar in Corebos just from the table of google cal events
- Deleting a google calendar event from Corebos is done one by one (just for the deleted records) using the beforedelete handler.