The goal of this tutorial is to show how we could add a new block in the detail view of a module where we could add some special functionality that we may need.
This is basically a two-step process; first, we have to add the information into the database so the application knows that it has to load a new block and what code it has to launch to fill it in, then we have to implement that class to generate the output.
For this tutorial, I am simply going to sum the number of Purchase Orders related to a contact and show that in a block on the contacts detail view.
To change the database we use vtlib and add a DetailViewWidget Link using vtlib:
$module->addLink(
  'DETAILVIEWWIDGET',
  'DetailViewPOINFOBlockWidget',
  "block://ContactPOInfoWidget:modules/Contacts/ContactPOInfoWidget.php"
);
As can be seen, we are adding a DETAILVIEWWIDGET with the label DetailViewPOINFOBlockWidget and with the link
block://ContactPOInfoWidget:modules/Contacts/ContactPOInfoWidget.phpthis last part is the really important one. It is saying that to generate the widget, the application must load a class named ContactPOInfoWidget which can be found in the file modules/Contacts/ContactPOInfoWidget.php. Obviously, we can call the class as we like (as long as it doesn't conflict with existing classes) and put the file wherever we want (as long as it is accessible inside coreBOS).
This class must implement only one method: getWidget() which will return the name of another class which will implement our functionality.
Now we have to implement the logic. This happens in a class that we must create and that can do anything we need it to. The class runs inside coreBOS so it has access to all the functionality of the application and we can use Smarty to generate output.
This class must implement one method called process() which will be called to generate the output on the screen.
In the case of this tutorial, that method executes a query against the database to obtain the purchase order information and then loads a Smarty template to generate a similar output to the existing blocks.
Have a look at the code which can be downloaded below and here is a screenshot of how it looks on screen:
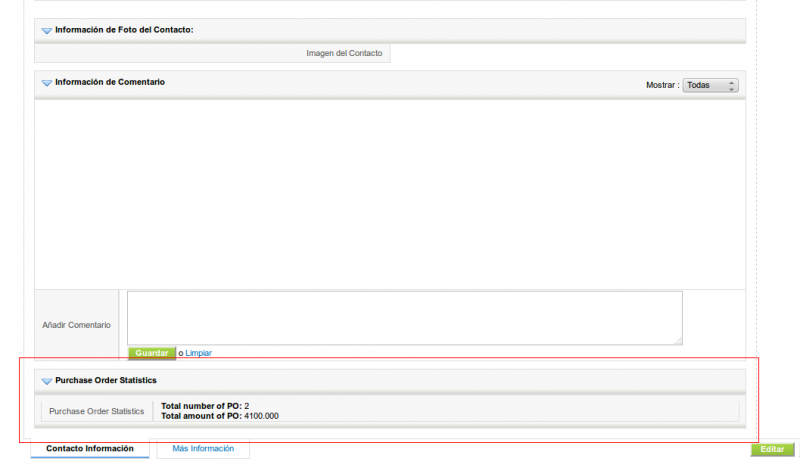
Contact Purchase Order Statistics Widget
Developer Blocks
From the example above you see that it is rather complex to add a new block with some custom code inside. So we have extended the possibilities in two ways. One is using templates and the other is using what we call developer blocks.
Developer blocks construct upon the idea above but make it easier to create the content giving us more boilerplate code done for us.
The initial idea is the same as above, you need a class that you reference in the DETAILVIEWWIDGET, this class returns another class that must implement a process() method. What we do is that this second class extends the class DeveloperBlock which gives you a set of predefined functions to help you concentrate only on the actual logic of your requirement.
Additionally, we have modified the DEAILVIEWWIDGET code to permit you to send more parameters into your class which is done using the URL parameter syntax.
The coreBOS Question analytical module has an example of the usage of the Developer Block which makes it easy to get the execution of the question into a block. Try these steps to see the result:
Create a Business Question
Like this:
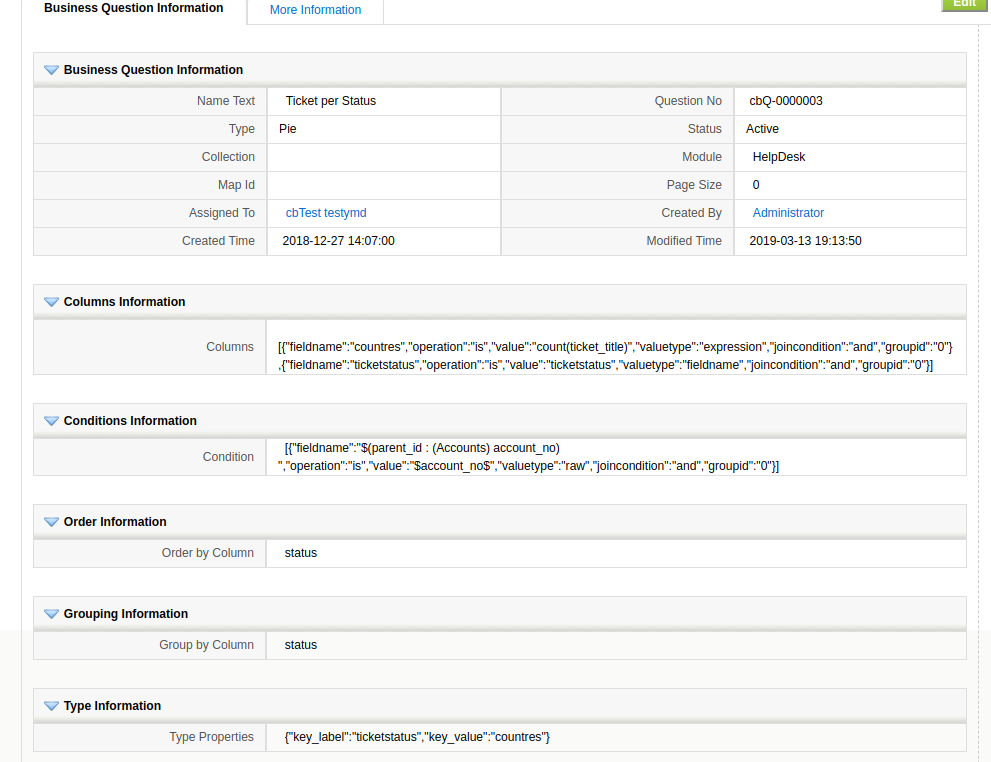
| Columns: | [{"fieldname":"countres","operation":"is","value":"count(ticket_title)","valuetype":"expression","joincondition":"and","groupid":"0"},{"fieldname":"ticketstatus","operation":"is","value":"ticketstatus","valuetype":"fieldname","joincondition":"and","groupid":"0"}] |
| Condition: | [{"fieldname":"$(parent_id : (Accounts) account_no) ","operation":"is","value":"$account_no$","valuetype":"raw","joincondition":"and","groupid":"0"}] |
| Type properties: | {"key_label":"ticketstatus","key_value":"countres"} |
Create a Business Action
This one will appear in the body of the detail view.
| Type: | DETAILVIEWWIDGET |
| Action: | block://bqanswer:modules/cbQuestion/cbQuestionWidget.php:QID=43177&RECORDID=$RECORD$ |
| Module: | Accounts |
Create another Business Action
This one will appear in the right panel.
| Type: | DETAILVIEWWIDGET |
| Action: | module=cbQuestion&action=cbQuestionAjax&file=cbQuestionWidget&QID=43177&RECORDID=$RECORD$ |
| Module: | Accounts |
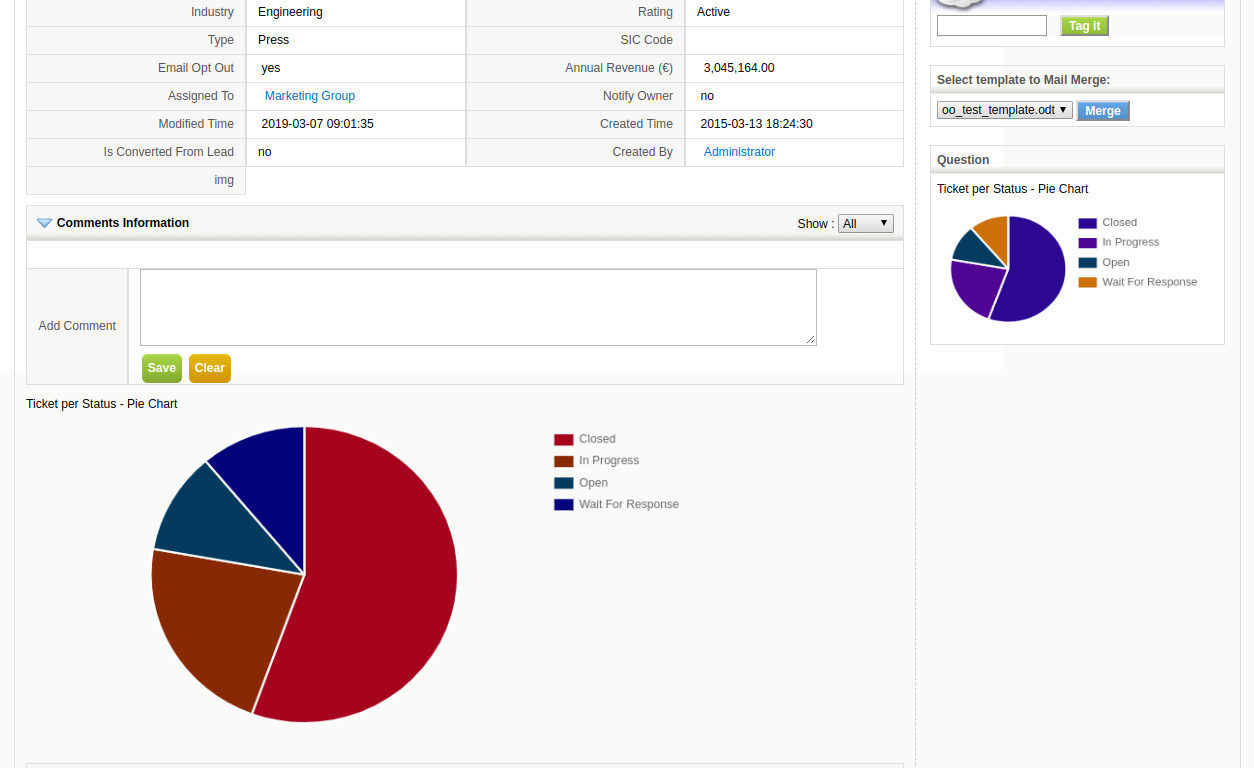
Appearence
Now go to any account with tickets and you should see something like this:
Another example: Show Message
The application has another native developer block that permits you to show a message. Watch the next video to see how that works and learn a little more about how this development resource works.
Another example: Mass Upload Documents
The application has another native developer block that permits you to mass upload documents. Watch the next video to see how that works and look at the commit to see the code.
Show IFRAME
You can show an IFRAME in a block with the showHTMLBlock, something like this:
block://showHTMLBlock:modules/Utilities/showHTMLBlock.php:op=iframe&height=400px&ex=http%3A%2F%2Fcorebos.org%3Fifcrmid%3D%24RECORD%24%26ifmodule%3D%24MODULE%24where you are passing to the Develop Block these parameters:
- op =iframe (there are curently no other options)
- height string of iframe height, optional
- ex URL Encoded string with the URL to load in iframe. you can
use the meta variables
- $RECORD$ which will be changed to CRMID of the current record if it exists
- $MODULE$ which will be changed to the MODULE NAME
Developer Block Template
This is the starting point of any developer block (the boilerplate).
<?php
/*************************************************************************************************
** PUT YOUR LICENSE HERE **
 *************************************************************************************************/
require_once 'modules/Vtiger/DeveloperWidget.php';
global $currentModule;

class YOURWIDGETNAMEHERE {
    // Get class name of the object that will implement the widget functionality
    public static function getWidget($name) {
        return (new YOURWIDGETNAMEHERE_DetailViewBlock());
    }
}

class YOURWIDGETNAMEHERE_DetailViewBlock extends DeveloperBlock {
    // Implement widget functionality
    private $widgetName = 'YOURWIDGETNAMEHERE';

    // This one is called to get the contents to show on screen
    public function process($context = false) {
        global $adb;
        $this->context = $context;
        $smarty = $this->getViewer();
        *************
        ALL YOU LOGIC GOES HERE
        *************
        return THE_HTML_YOU_WANT_TO_SHOW_INSIDE_THE_BLOCK;
    }
}

if (isset($_REQUEST['action']) && $_REQUEST['action']==$currentModule.'Ajax') {
    $smq = new YOURWIDGETNAMEHERE_DetailViewBlock();
    echo $smq->process($_REQUEST);
}
How to add a special block to a module using templates
You can find a much easier way to add this type of block which also supports Edit View in this tutorial.