This feature permits Configuring an IMAP mailbox to scan for messages and convert them to appropriate entities in the application.
Mail Converter adds the capability to scan your mailbox and take actions on messages that matches the established criteria.
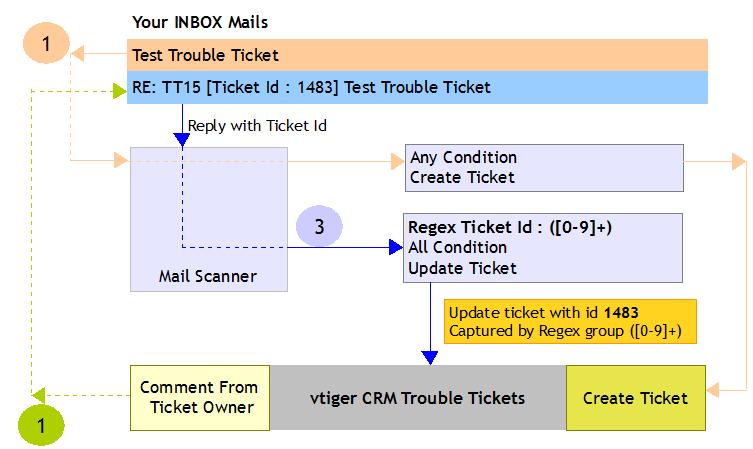
The main functionality it was created for is to manage the Help Desk workflow with the logic that can be seen in the next image:
Configure Mailbox
You can access the Converter in Settings → Mail Converter
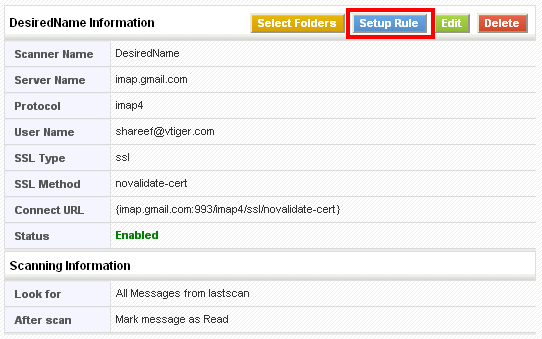
You need to provide the mailbox information on which the scan needs to be performed. By default the mailbox will be disabled as no information is available.
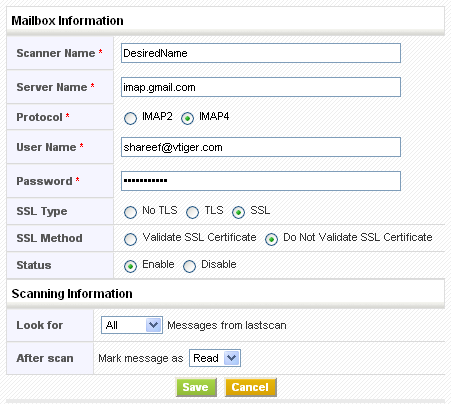
Provide configuration details to establish connection with your mail server and click on the Save button; As a result, all the available folder names will be fetched. If the connection fails the information will not be saved.
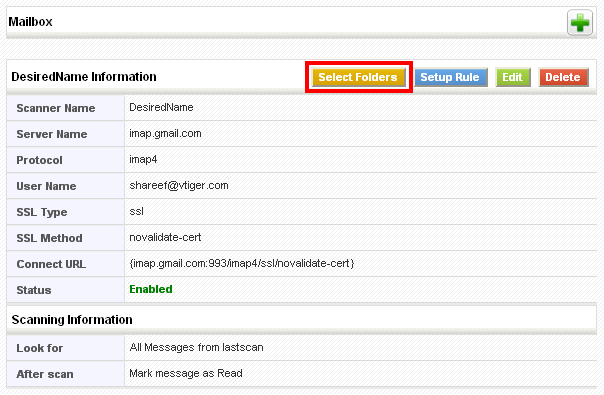
Select Folders
After mailbox setup you can select the folders which should be considered for scanning the mails. Click on the Select Folders button.
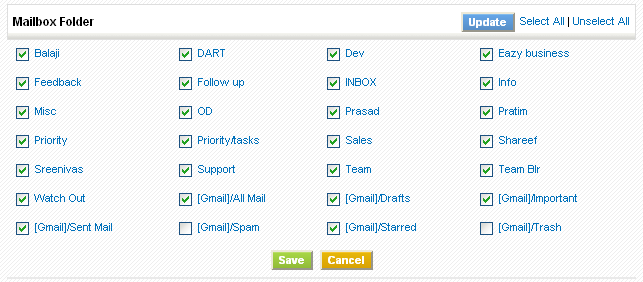
You can exclude or include the folders by selecting/de-selecting the checkbox as shown here:
Rules
You can setup one or multiple rules on a mailbox which permit you to perform actions on a mail based on the criteria.
Click on the Add Rule button and set up the actions that you would like to perform on a mail.
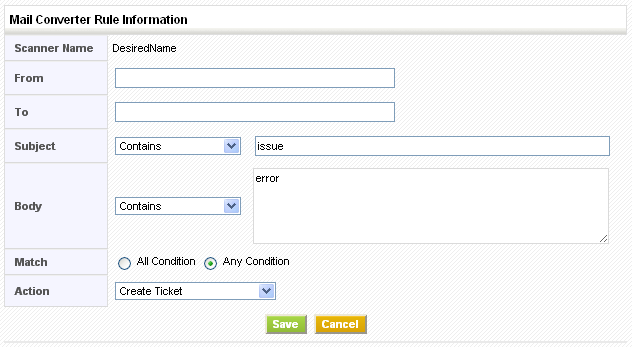
Rule criteria
Rule criteria are evaluated as follows:
| From | Check for the input occurrence in the FROM field of the email |
| To | Check for the input occurrence in the TO field of the email |
| Subject | Compare the input with SUBJECT of email using one of the condition selected (Contains, Not Contains, Equals, Not Equals, Begins With, Not Begins With, Regex) |
| Body | Compare the input with BODY of email using one of the condition selected (Contains, Not Contains, Equals, Not Equals, Begins With, Not Begins With) |
| Match | All Condition – All the input conditions should evaluate as true to take Action |
| Any Condition – At least one condition should evaluate as true to take Action |
Once a successful matching on an email occurs, the action will be applied on it as follows:
| Create Ticket | Creates a new trouble ticket record with the following: Title = SUBJECT of email Description = BODY of email Attachments of email will be linked to the trouble ticket record |
| Lookup is made for existing Contact/Account based on FROM field of email and ticket is associated to matching record (if found) | |
| Update Ticket | Updates existing trouble ticket record with the following: Comment = BODY of email |
| Lookup is made on existing trouble ticket based on FROM field of email and title or CRMID match. Preferable to select Regex as Subject and paste the following code in the text area
Ticket Id[^:]?: ([0-9]+) |
|
| Add to Contact[FROM] | Lookup is made for existing Contact based on FROM field of email. On success a new email record is created and is associated to matching record. |
| Add to Contact[TO] | Lookup is made for existing Contact based on TO field of email. On success a new email record is created and is associated to matching record. |
| Add to Account[FROM] | Lookup is made for existing Account based on FROM field of email. On success a new email record is created and is associated to matching record. |
| Add to Account[TO] | Lookup is made for existing Account based on TO field of email. On success a new email record is created and is associated to matching record. |
Example: Rule to create trouble ticket from any email is shown below:

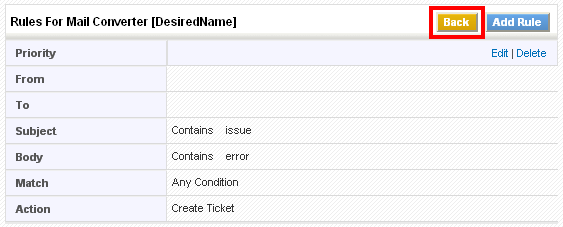
Rule Priority
One or more rules for the mailbox which are applied in sequence while Scanning. You can change the order (Priority) by clicking the arrow marks.
Manual Scanning
Click the Back button after setting rule or rules.
After setting up at least one rule you can scan the mailbox.
Now click on the Scan Now button. It might take long time based on the amount of emails that will be present in the mailbox (configured folders)
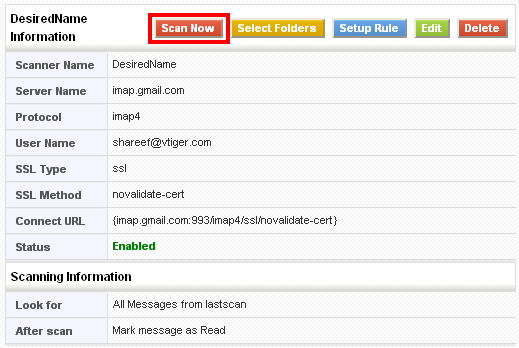
As soon as scanning is finished you will get changes according to the rules you have set for creating and updating Trouble Ticket or adding an e-mail to Organizations or Contacts.
Note: When using WorkFlows, the module MailConverter uses is actually Messages, not E-Mails.